
Summary
Key steps:

-
Log in to Catina.
-
Select the Projects tab.
-
Click New Project.
-
Enter your project information.
-
Complete as many fields as possible to save time when creating documents later.
-
Click Create.
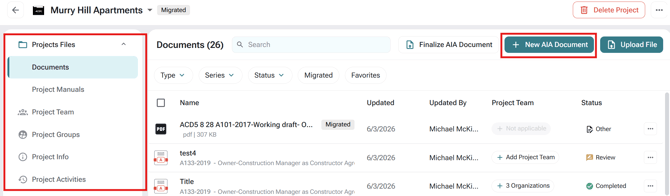
You will be taken to the Project page, where you can:
-
Create and manage documents
-
Add project manuals
-
Manage project team members
-
View project information
-
Review project activity
-
Create a New AIA Document
-
Upload Files
-
-
-
FAQs
Q: Do I need to create a project before uploading a document in Catina?
A: Yes. All documents must be associated with a project before they can be created or finalized.Q: Where do I go to start a new project in Catina?
A: Click the Projects tab, then select New Project to begin entering your project details.Q: What information is required to create a project?
A: You'll need to enter basic project details such as project name and location. Filling in as much information as possible can save time later when creating documents.Q: Can I edit project details after the project is created?
A: Yes, you can return to your project page and update details as needed.Q: What happens after I create the project?
A: You’ll be taken to the Project page, where you can add documents and manage other project-related actionsQ: s an organization name required for contacts such as homeowners who do not have an organization or title?
A: Contacts added to a project must be assigned to an organization. For homeowners without an organization, you can enter the homeowner’s information in both the organization and contact fields. You can also configure the document without selecting an organization or contact, then enter the contact information directly in the document.
Q: Does project and project-team information populate across documents?
A: Yes. Set up the project information and project team before creating documents so Catina can automatically populate that information in each new document associated with that project.
Q: Can I edit project details after creating a project?
A: Yes. Open the project, select Project Info, and then select Edit. Changes will apply to documents you create after the update, but they will not change existing documents.
-
-